
Trong hướng dẫn này , tôi sẽ chỉ cho bạn làm thế nào để tạo ra một thao tác hình ảnh siêu thực gồm có một người đàn ông với một đầu cây.
Đầu tiên , chúng ta sẽ tạo một nền tảng với lĩnh vực và bầu trời và sau đó thêm các mô hình và làm một số chỉnh sửa về anh ta. Sau đó chúng tôi sẽ thêm cây, đám mây và sét và gộp chúng với phần còn lại sử dụng lớp điều chỉnh, masking và brushes. Sau đó , chúng ta sẽ vẽ mưa và hạt mưa cũng như kết hợp các lá vào cảnh. Chúng tôi sẽ sử dụng một số lớp điều chỉnh để nâng cao hiệu quả cuối cùng.

Chuẩn bị:
1. Thêm Field và Sky
Bước 1
Tạo một tài liệu mới khoảng 2000 x 1581 pxtrong Photoshop với các cấu hình:

Bước 2
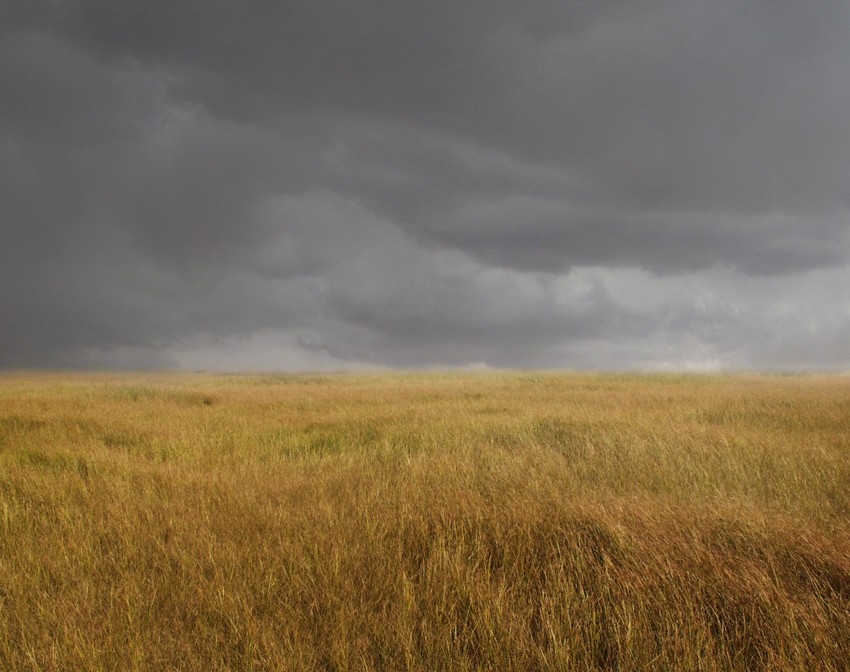
Mở hình ảnh trường (field image). Lấy trường chỉ sử dụng Rectangular Marquee Tool ( M ) và kéo nó vào trong nền trắng với Move Tool ( V ):
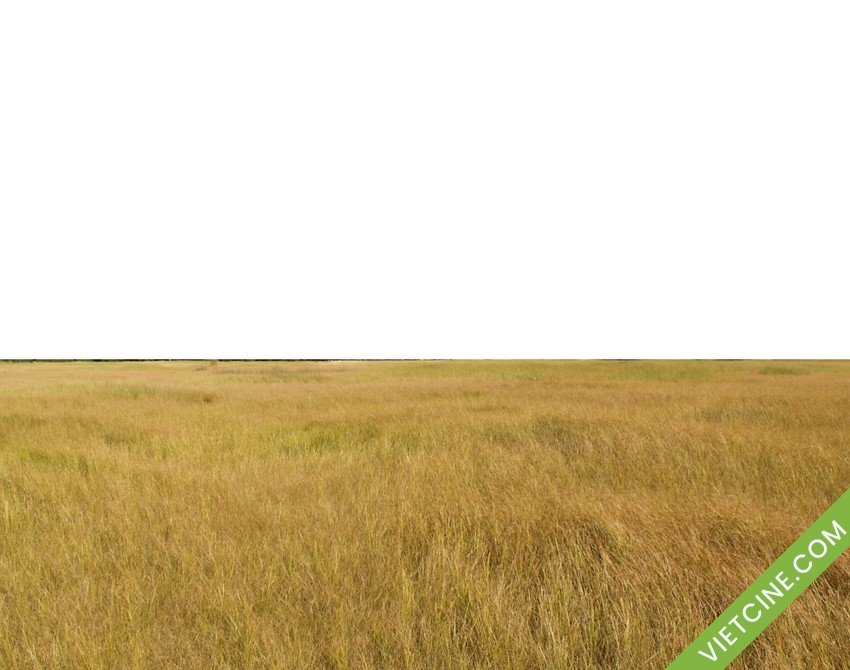
Nhấp vào biểu tượng thứ hai ở dưới cùng của bảng Layers để thêm một mặt nạ cho layer này. Sử dụng brush màu đen để làm mềm các cạnh của hình:
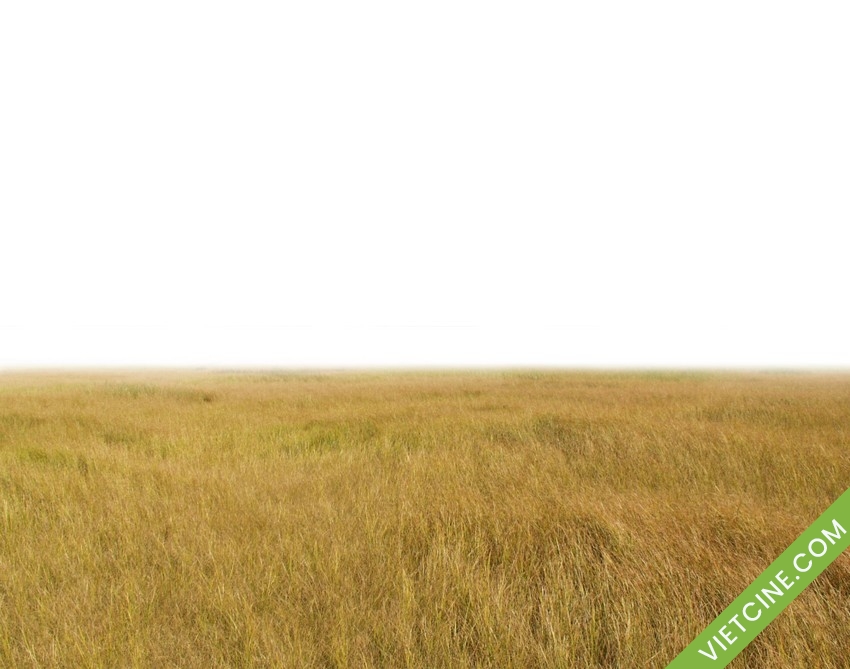
Bước 3
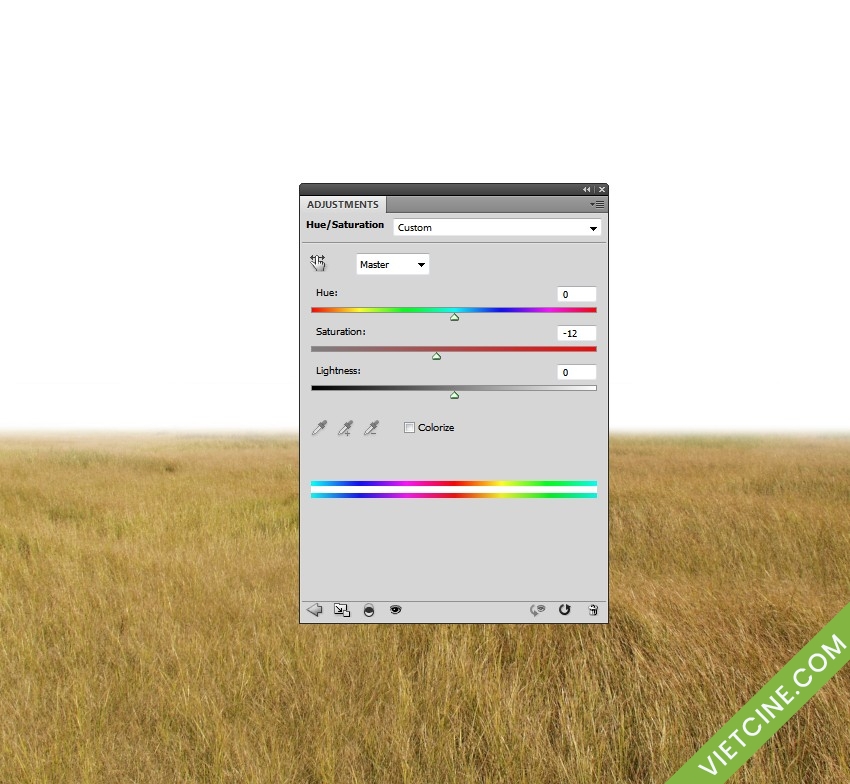
Vào Layer > New Adjustment Layer> Hue / Saturation và thiết lập nó như là Clipping Mask. Mang giá trị Saturation xuống -12 :
Bước 4
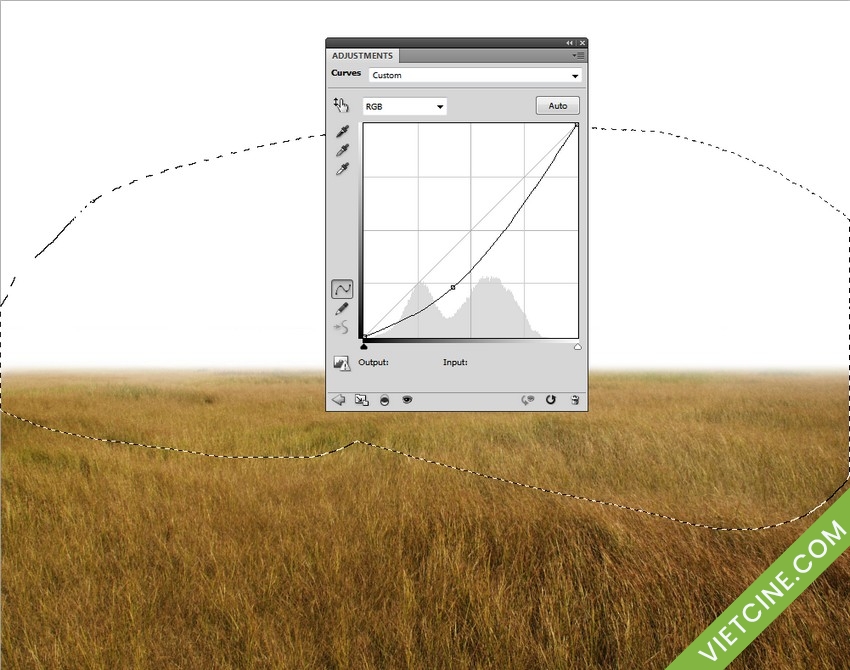
Sử dụng một lớp điều chỉnh Curves để làm tối lĩnh vực này. Mở layer mask, sử dụng soft black brush để giảm bóng tối trên các cạnh của lĩnh vực này:
Bước 5
Kéo hình ảnh bầu trời vào trong khung chính, và đặt layer này thuộc lĩnh vực một.
2. Add the Model
Bước 1
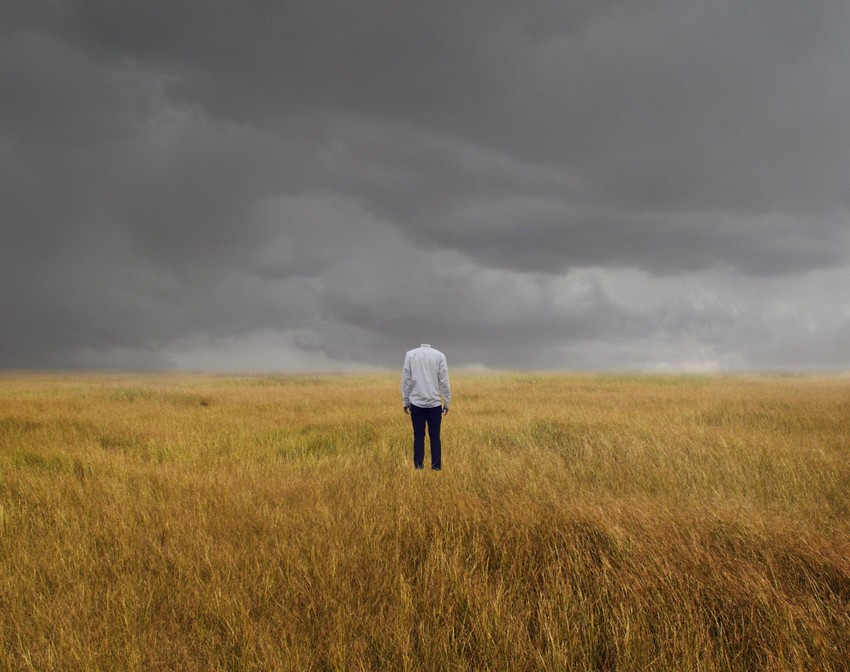

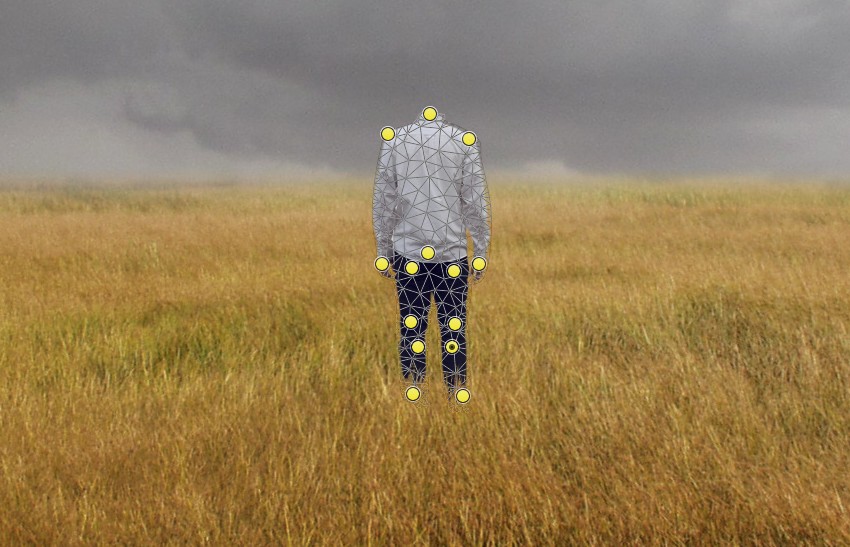
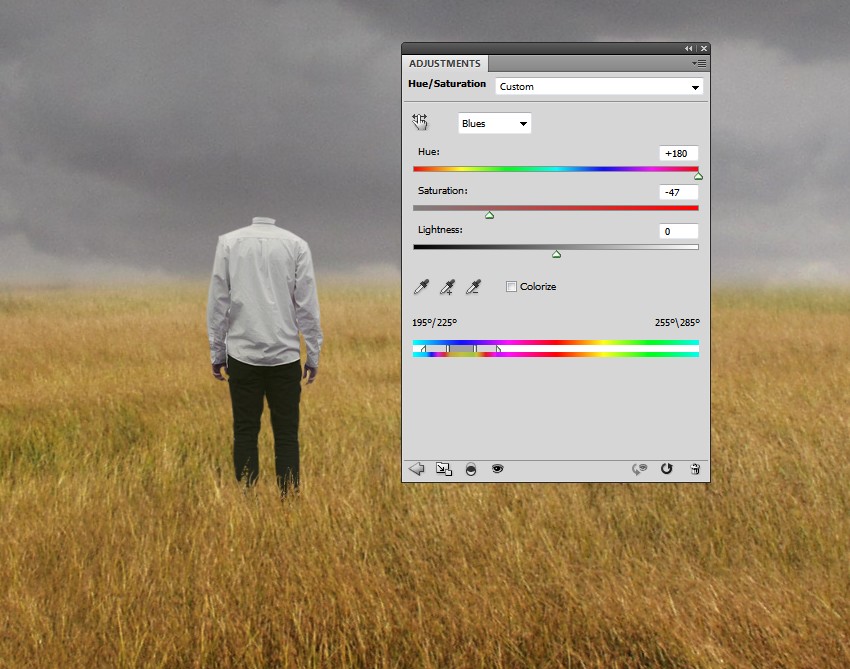
Tạo một layer mới , thay đổi chế độ Overlay 100 % và điền với 50 % màu xám:
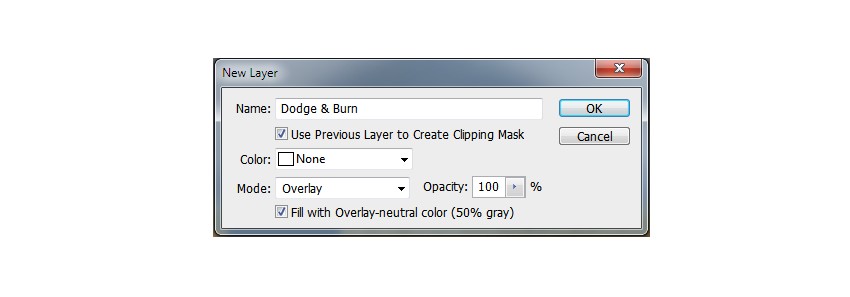
Kích hoạt Dodge và Burn Tool (O) với Midtones Range, phơi khoảng 20-30 % để giảm bớt ánh sáng trên vai, và vẽ thêm chi tiết và nếp nhăn cho quần .

Bước 1
Mở hình ảnh cây. Kéo cây vào tài liệu chính của chúng tôi bằng cách sử dụng Move Tool. Đặt layer này dưới người đàn ông một.

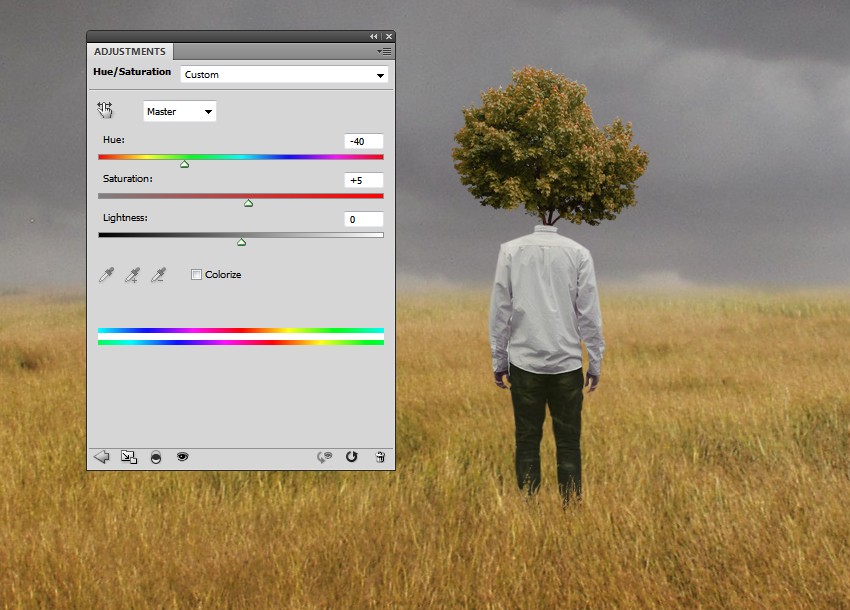
Thêm một lớp điều chỉnh Hue / Saturation và thay đổi các thiết lập Master:
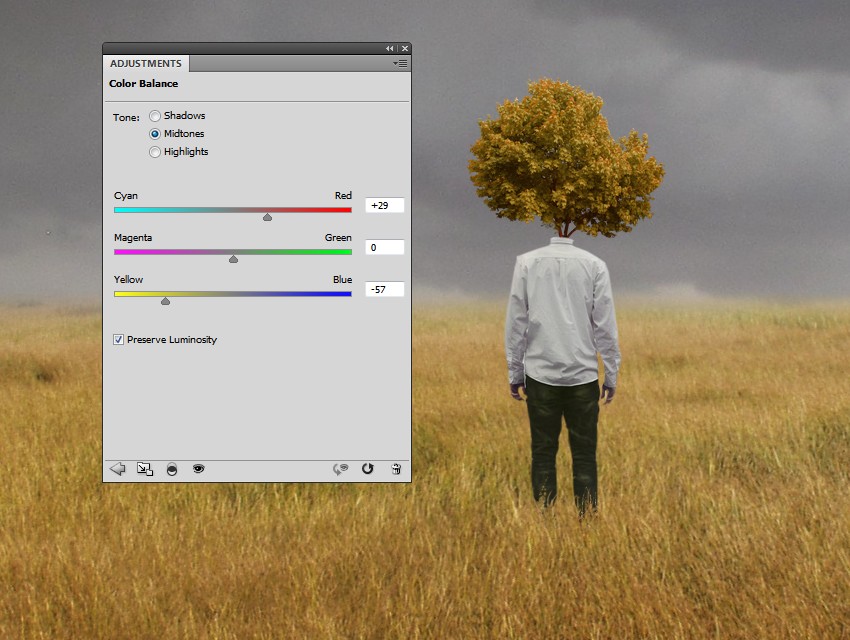
Tạo một lớp Color Balance và điều chỉnh giá trị Midtones :
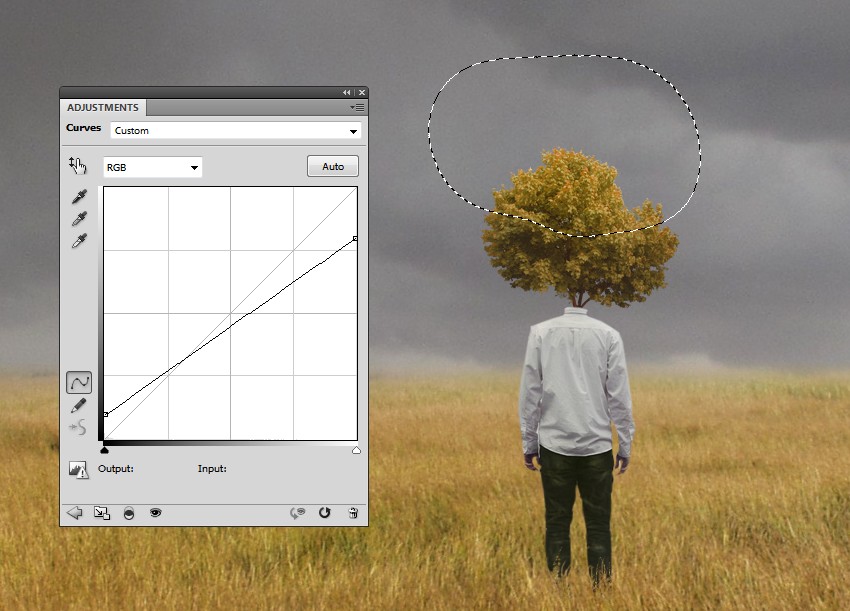
Tạo một layer hiệu chỉnh Curves để làm giảm độ tương phản của cây. Mở lớp mặt nạ này, sử dụng một bàn chải mềm màu đen để loại bỏ các hiệu ứng trên các đỉnh của cây cần được sáng hơn phần còn lại ( như nó được ánh sáng từ những tia chớp ) :
Bước 1
Mở hình ảnh đám mây. Đi đám mây trên dưới bên phải với Lasso Tool và thiết lập radius thành 15. Đặt lựa chọn này trên cây:
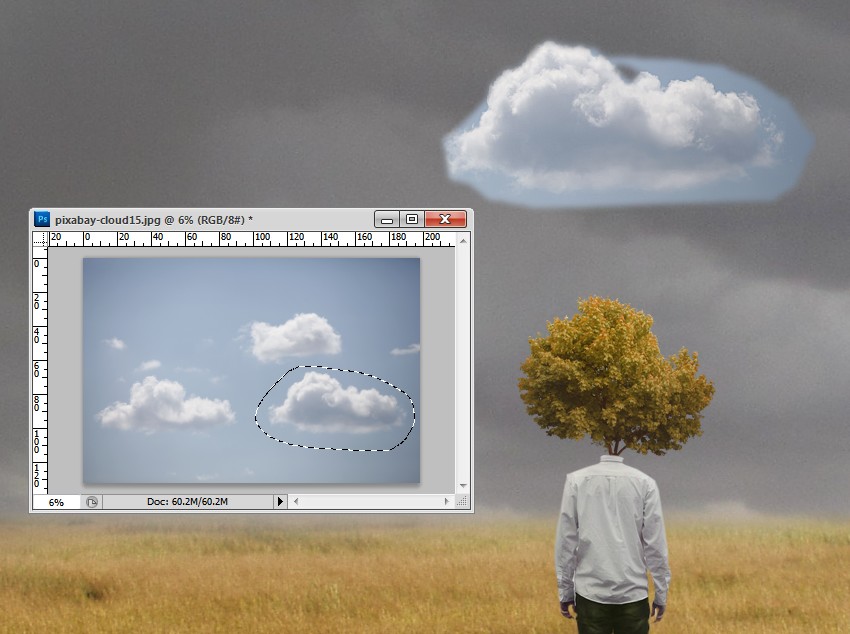
Add a mask to the cloud layer and carefully remove the blue background using a medium-soft black brush. You can use a tablet pen to achieve a more accurate result.

Step 2
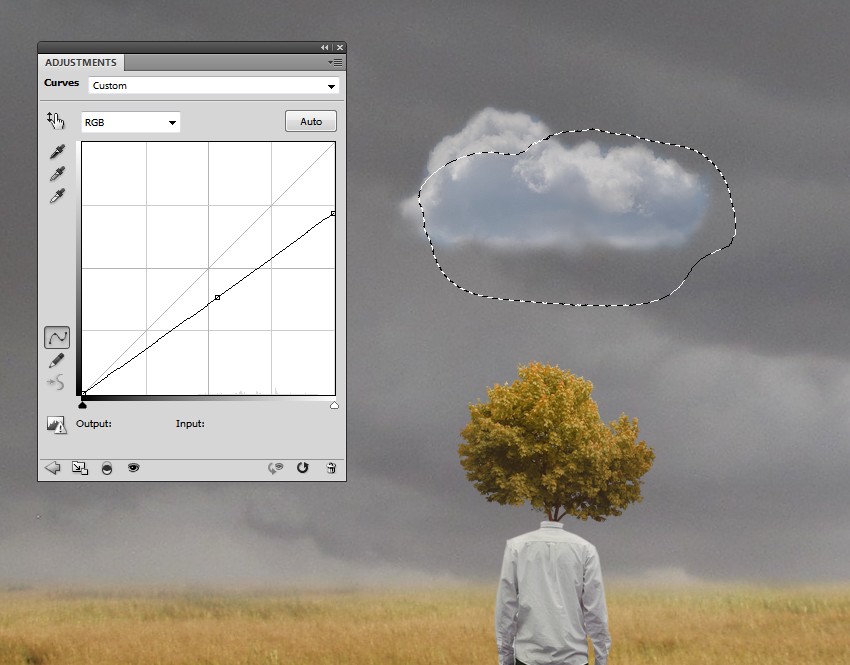
The light and shadow on the cloud don’t fit the background. To correct it, create a Curves adjustment layer and reduce the lightness. Paint on the lower right of the cloud to make the effect visible only on the top left.
Step 3
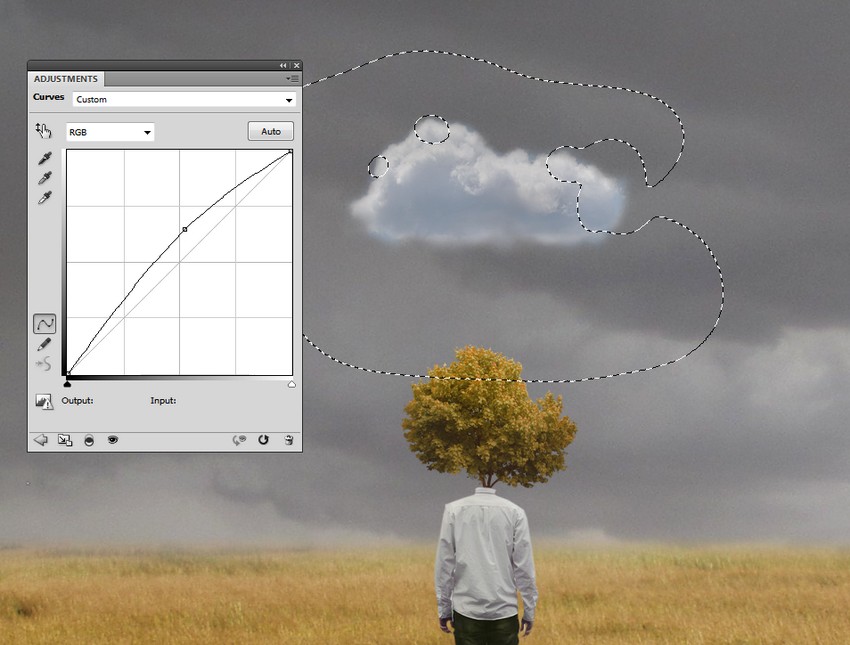
Add another Curves adjustment layer to brighten the top right a bit. Paint on the left so that it isn’t affected by this adjustment layer.
Step 4
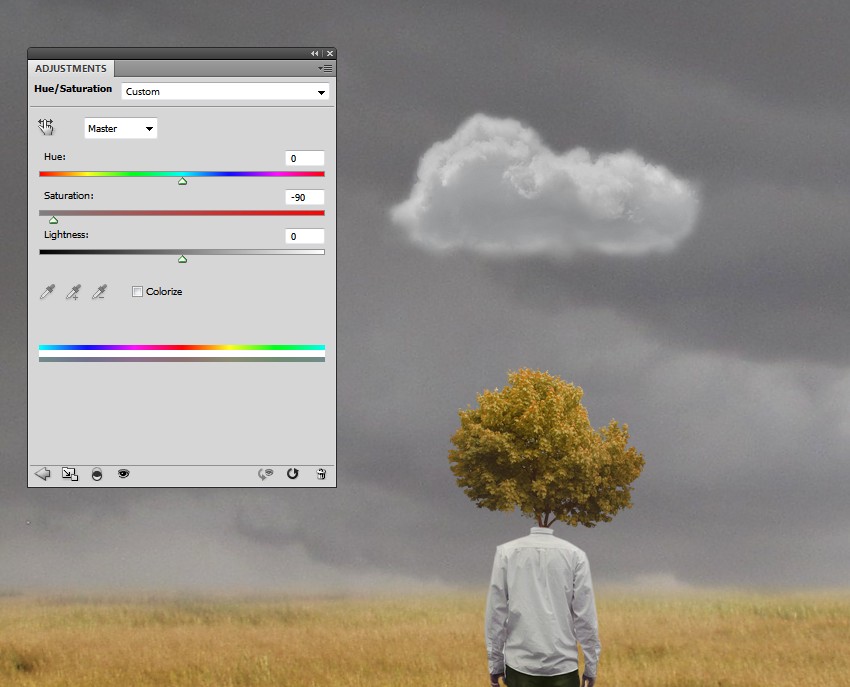
Use a Hue/Saturation adjustment layer to desaturate the cloud:
5. Add the Lightning
Step 1
Drag the lightning image into our main document and place it in the space between the tree and cloud. Change this layer mode to Screen 100%:
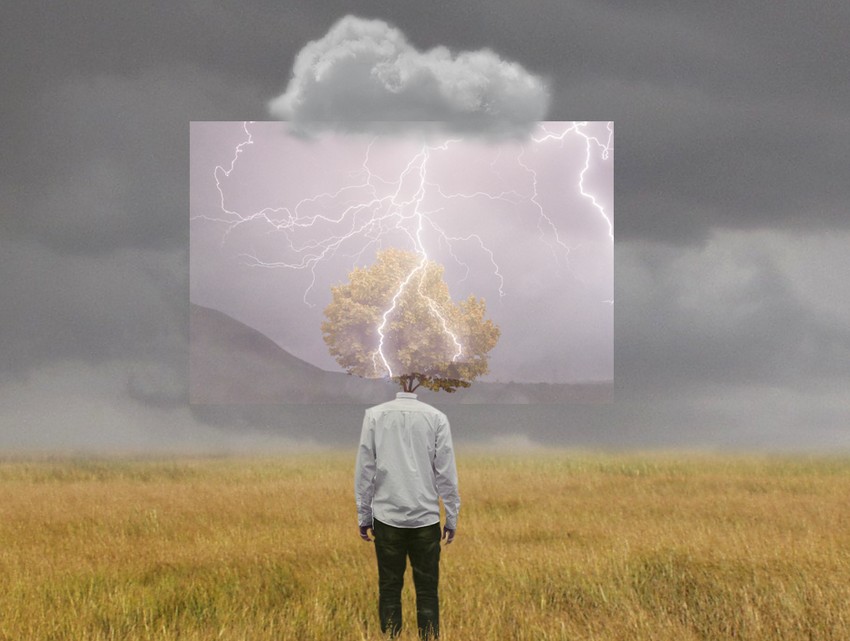
Use a layer mask to remove the edges and limit the lightning area within the cloud:

Step 2
Create a Levels adjustment layer and increase the shadow value. This step is to remove most of the background of the lightning.
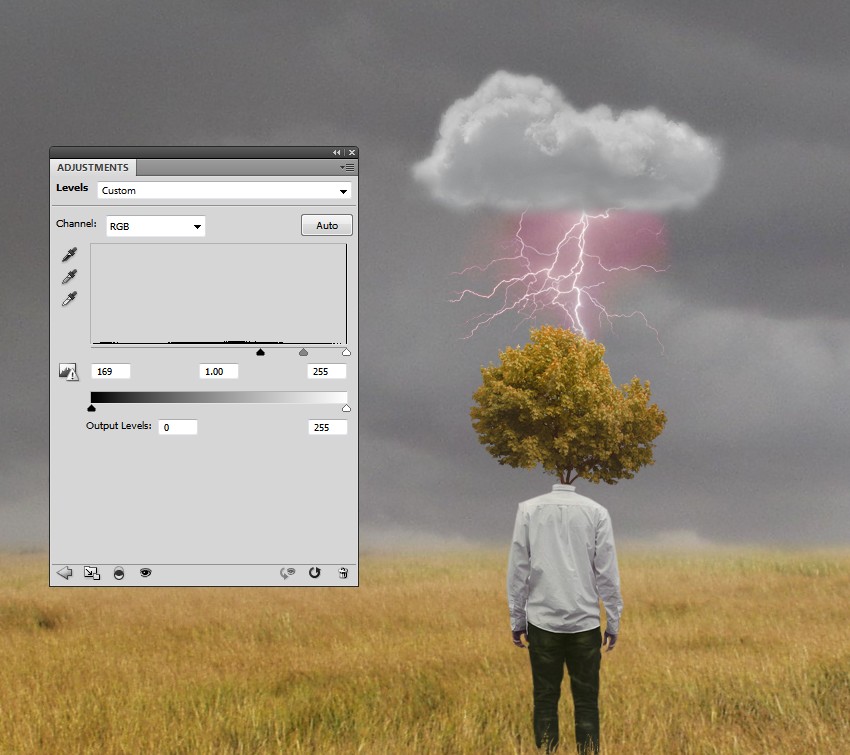
Step 3
Use a Hue/Saturation adjustment layer and bring the Saturation value to -100:
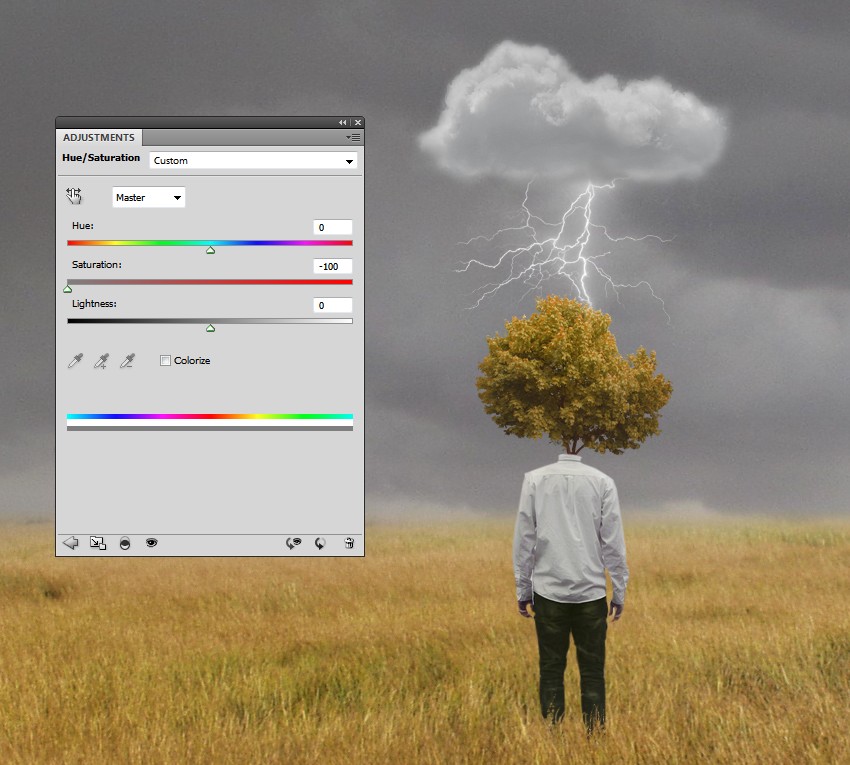
6. Make the Rain
Step 1
In this stage we’ll be making the rain. Create a new layer on top of the layers and change the foreground to#ededed. Select a hard brush and press F5 to change the settings of this brush:
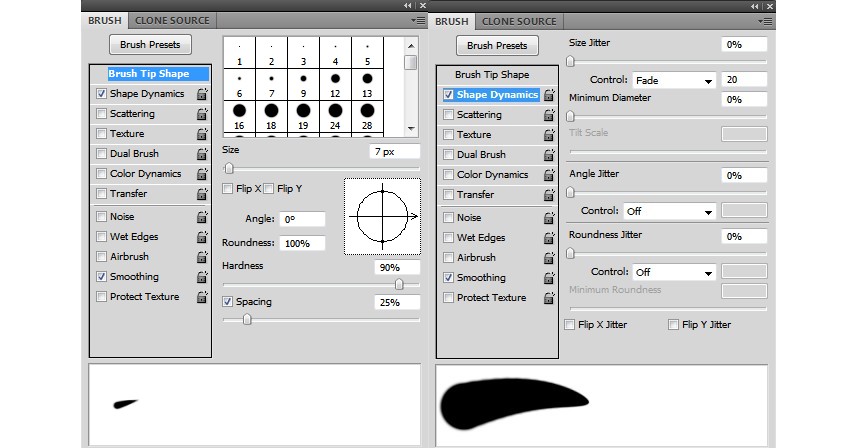
Use this brush to paint random vertical lines inside the space from the cloud to the tree.

Flip it vertically by choosing Edit > Transform > Flip Vertical:

Step 2
Go to Filter > Blur > Motion Blur:
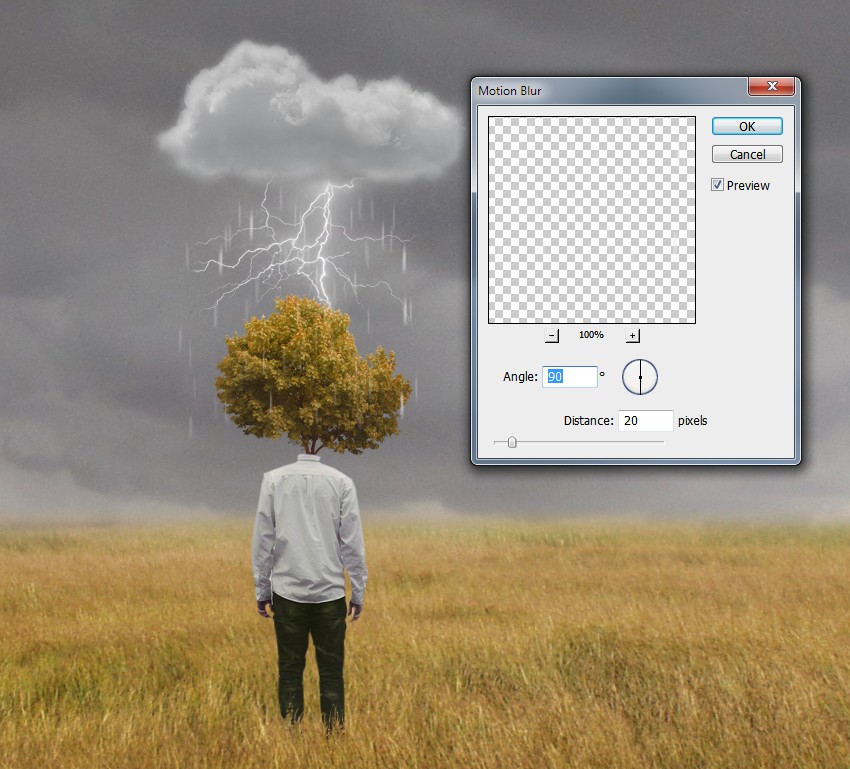
Use a layer mask to remove some rain effects outside the cloud and tree area.

Step 3
Duplicate the rain layer many times and decrease the distance of the Motion Blur filter on the duplicated layers, from 20 to -15, -12, -10 for example, and also reduce the size. It will create some depth and a natural look for the rain.

Step 4
Create a new layer and use the same brush to paint the raindrops and splashes on the tree and shoulders. Vary the brush size to achieve a better result.

Step 5
Create a new layer and grab several selections on the man’s shirt using the Lasso Tool, setting the feather for it to 2px. Fill them with the color #d2d1cb (picked from the shirt):

Change this layer mode to Multiply 100% to create the wet effect on the man:

Step 6
Make a new layer and use a soft brush with the color #ededed to paint under the cloud, above the lightning area, to add more light to this. Change this layer mode to Soft Light 100%.

7. Add the Leaves
Step 1
Open the leaves image. Select a leaf and add it to the main document. I’ve placed it on the left and usedControl-T with the Warp mode to bend it as shown below:

Go to Filter > Blur > Gaussian Blur and set the Radius to 8 px:
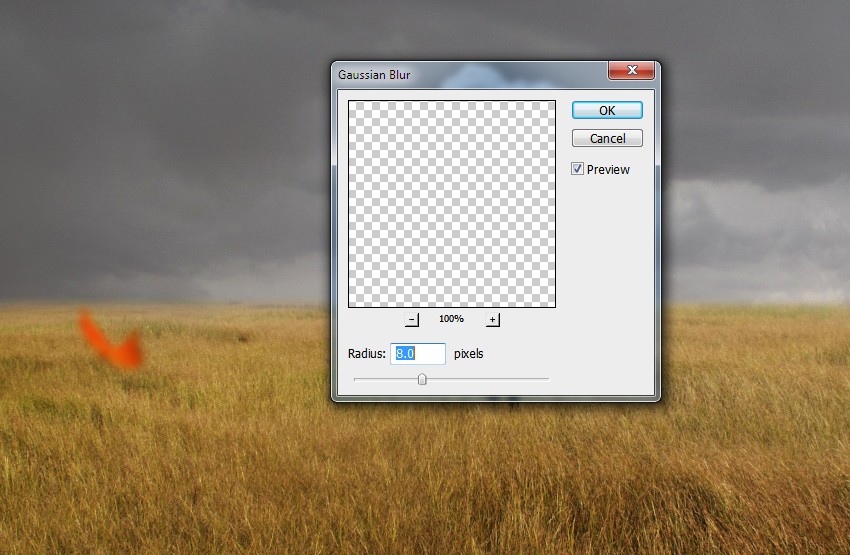
Step 2
Add more leaves to the scene using the same method. Vary the size and the blur radius to increase the depth of field.

Step 3
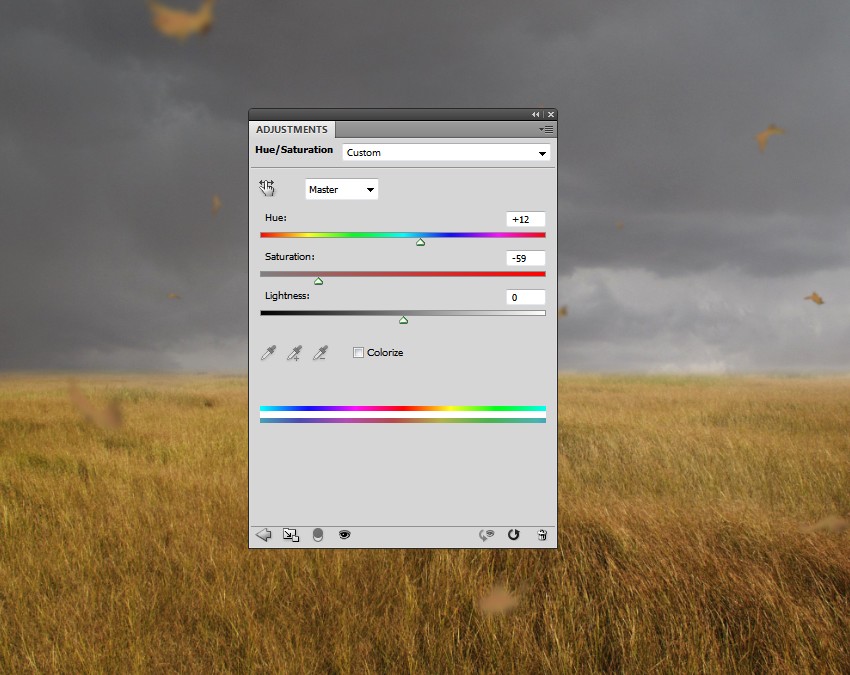
Make a group for the leaf layers and change the group mode to Normal 100%. Use a Hue/Saturationadjustment layer and change the Master settings:
Step 4
Add a Curves adjustment layer and increase the lightness.
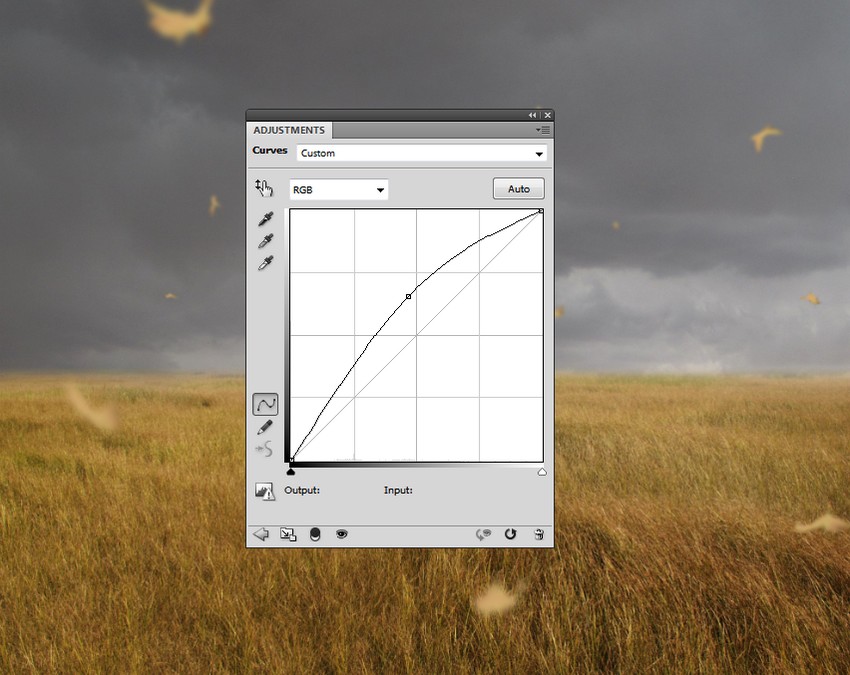
Here are the results after working on the layer mask. We’re aiming to make the main light in the center, so you know how to mask off the leaves.


8. The Final Adjustment
Step 1
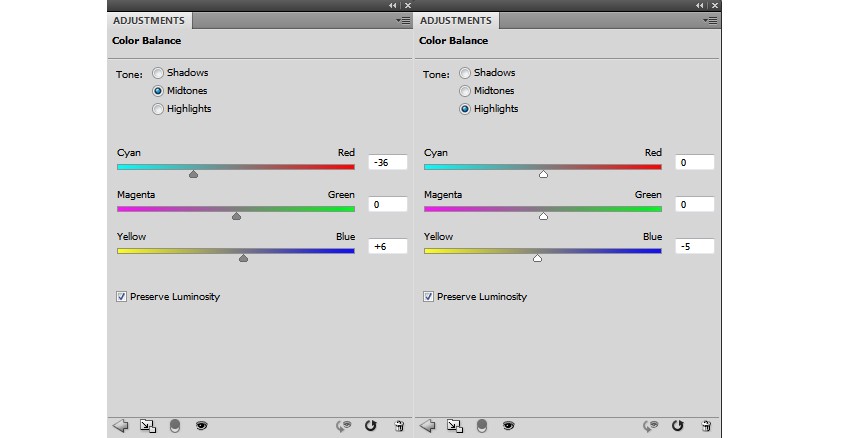
Create a Color Balance adjustment layer and change the Midtones and Highlights settings:

Step 2
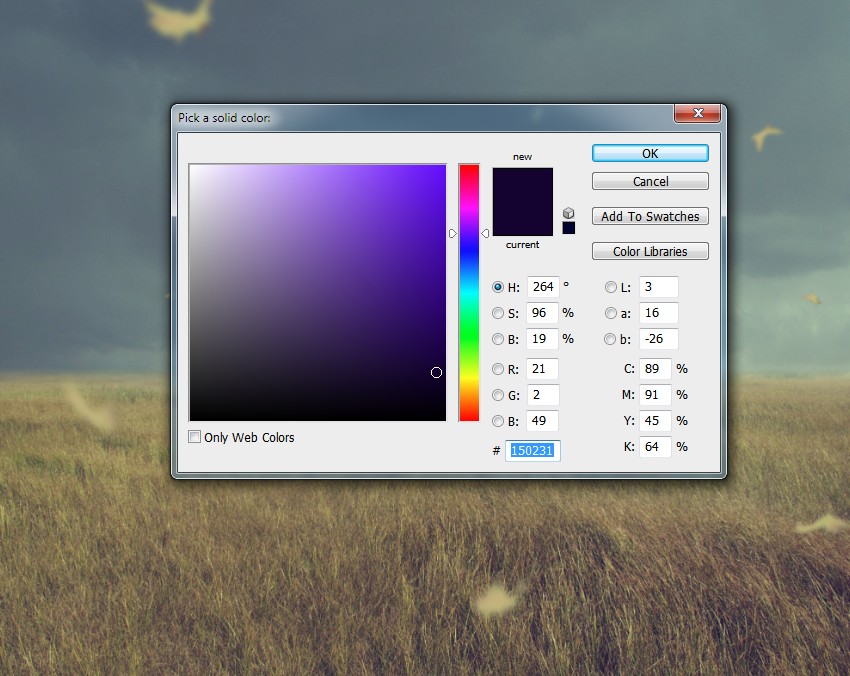
Make a Color Fill layer and pick the color #150231. Change this layer mode to Exclusion 100%:
Step 3
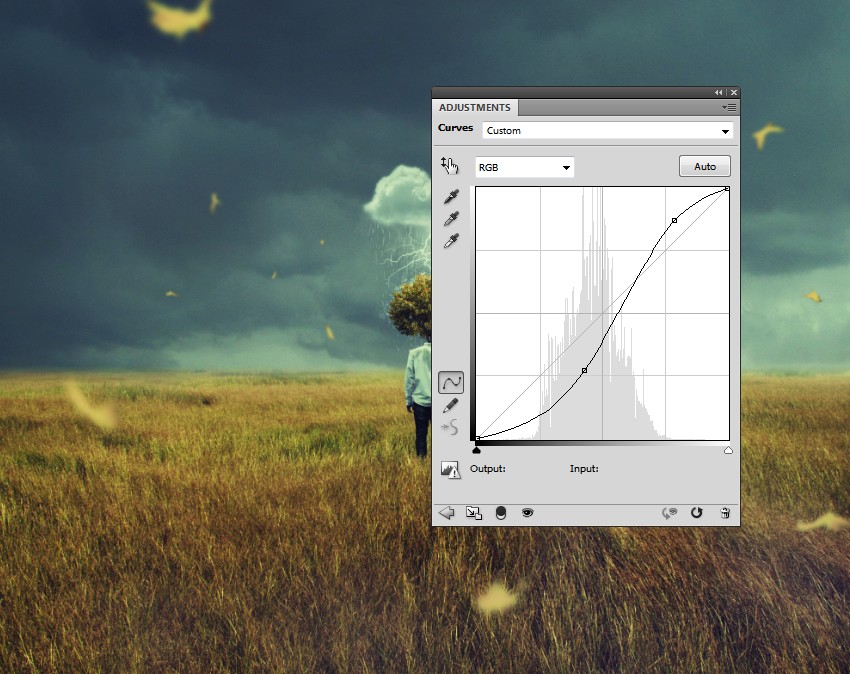
Make a Curves adjustment layer and increase the contrast:
Step 4
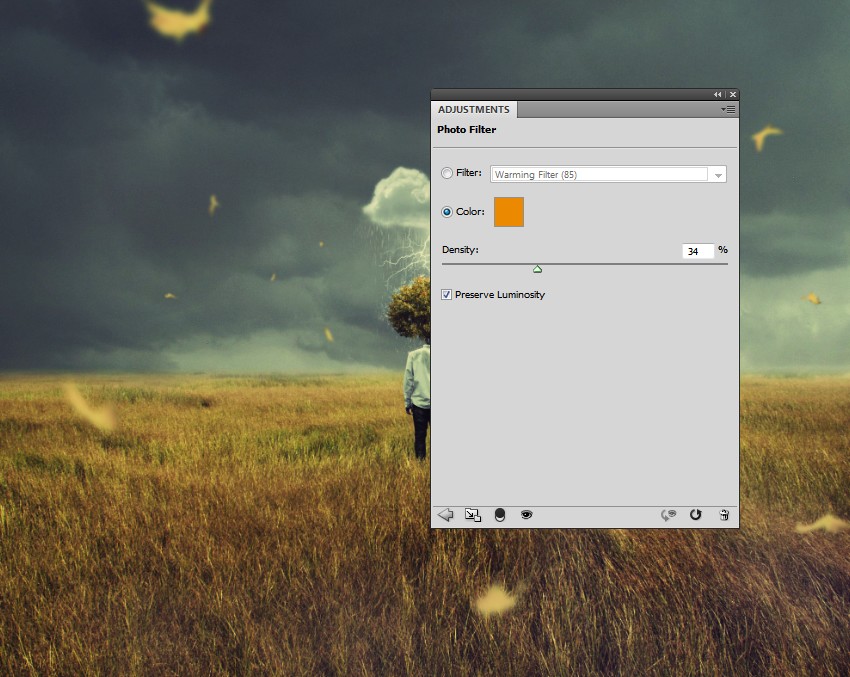
Create a Photo Filter adjustment layer and pick the color #ec8a00:
Step 5
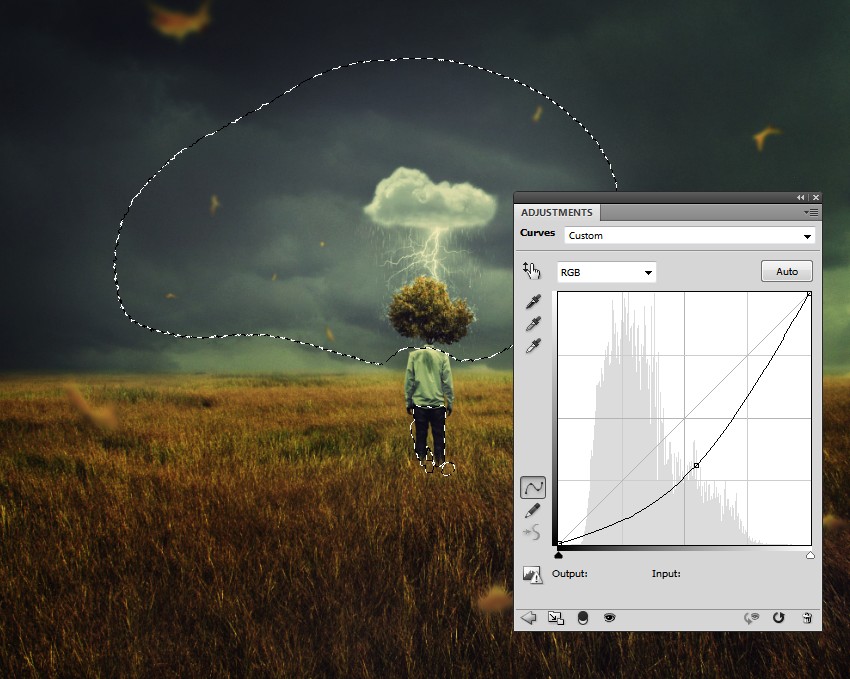
Add another Curves adjustment layer to darken the scene more. Paint on the middle and the model to reveal the light there:
Step 6
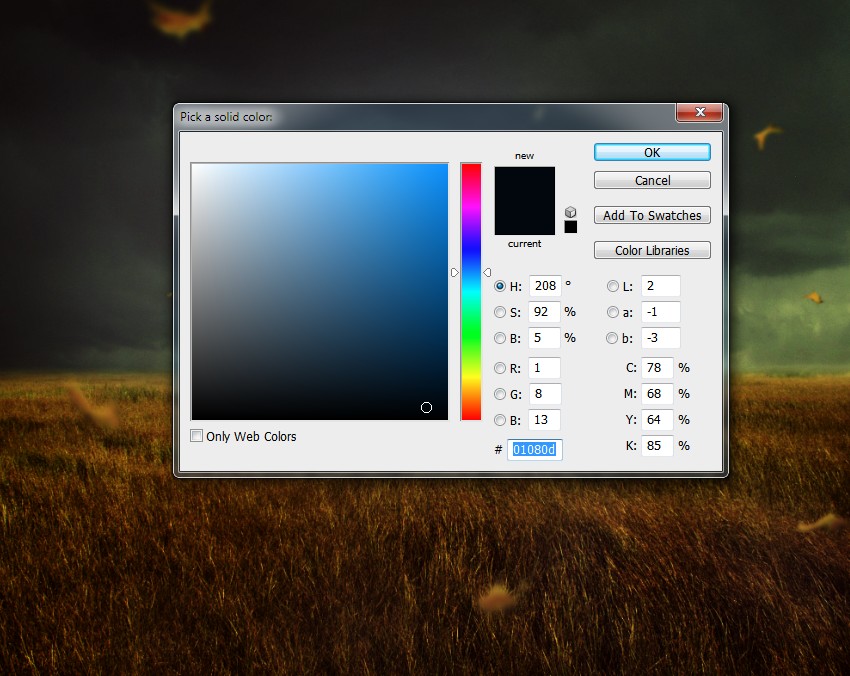
Make another Color Fill layer and pick the color #01080d. Change this layer mode to Subtract 100%.
Advertisement
Step 7
Duplicate this layer and change the mode to Normal 40%. Use a layer mask to paint on the middle to create a subtle vignette effect:

Congratulations, You’re Done!
I hope that you’ve enjoyed my tutorial and learned something new. Feel free to share your ideas or comments in the box below—I’d love to see them. Enjoy Photoshopping!


